
As the owner of JDavis Painting in Toronto, people are constantly asking how we achieve such a fantastic finish on our interior paint jobs. A lot of our clients are deciding whether to hire a pro (us!) for their interior painting needs, or do it themselves… and I’m always happy to share some of my wisdom.
I started in the painting industry back in 2003, and since then, I’ve picked-up a lot of tips and tricks along the way. In the following series, I’m going to share how to paint the interior of a house: from start to finish. Along the way, I’ll do my best to stick to the fundamentals… but please excuse me if I get carried away from time to time. I have a real passion for this stuff!
So for all you DIYers thinking of painting the interior of your home, this one’s for you!
The Ultimate Guide to Exterior House Painting
Trust me I get it– the process of exterior house painting can be overwhelming, especially if you’re not familiar with the various factors to consider when choosing paint colours, materials, and finishes. To help, I’ve put together the ultimate guide to exterior house painting. From preparing your home’s exterior surfaces to choosing the right paint and hiring a qualified professional (like us!) to get the job done, I’ll cover everything you need to know.
Whether you’re a DIY enthusiast or prefer to leave it to the pros, I’m happy to help! That’s why this guide is packed with valuable insights and tips to help you achieve a beautiful, long-lasting finish that you can be proud of for years to come.
So here you go, let’s jump right in!
- 1. The Importance of Exterior House Painting
- 2. Choosing the Right Type of Exterior House Paint
- 3. Different Paint Finish Options
- 4. How to Choose Your Colour Scheme
- 5. Preparing the Exterior Surface
- 6. Repairing Damaged Surfaces
- 7. Don’t Forget Primer!
- 8. Choosing the Right Tools
- 9. Different Painting Techniques
- 10. Safety Considerations
- 11. Cleanup and Maintenance
- 12. Hiring a Professional for Your Exterior House Painting Needs
The Importance of Exterior House Painting
I cannot overstate enough how essential exterior house painting and maintenance are! Whether you’re a new or longtime homeowner, having quality exterior house paint can help promote structural integrity while still providing a stand-out appearance.
Weather Protection
One of the main benefits of exterior house painting is that it provides a protective layer against weather damage. Your home’s exterior is constantly exposed to harsh elements such as rain, wind, sunlight, and snow, which can cause significant damage over time. A fresh coat of weather-resistant paint can help protect your home’s exterior from moisture damage, prevent wood rot, and resist cracking or peeling.
By investing in a quality exterior house painting job, you can also save money in the long run by avoiding expensive repairs or replacement of damaged materials from extreme weather conditions. Regular exterior paint upkeep is a cost-effective way to maintain your home– so it’s a win-win for everyone!
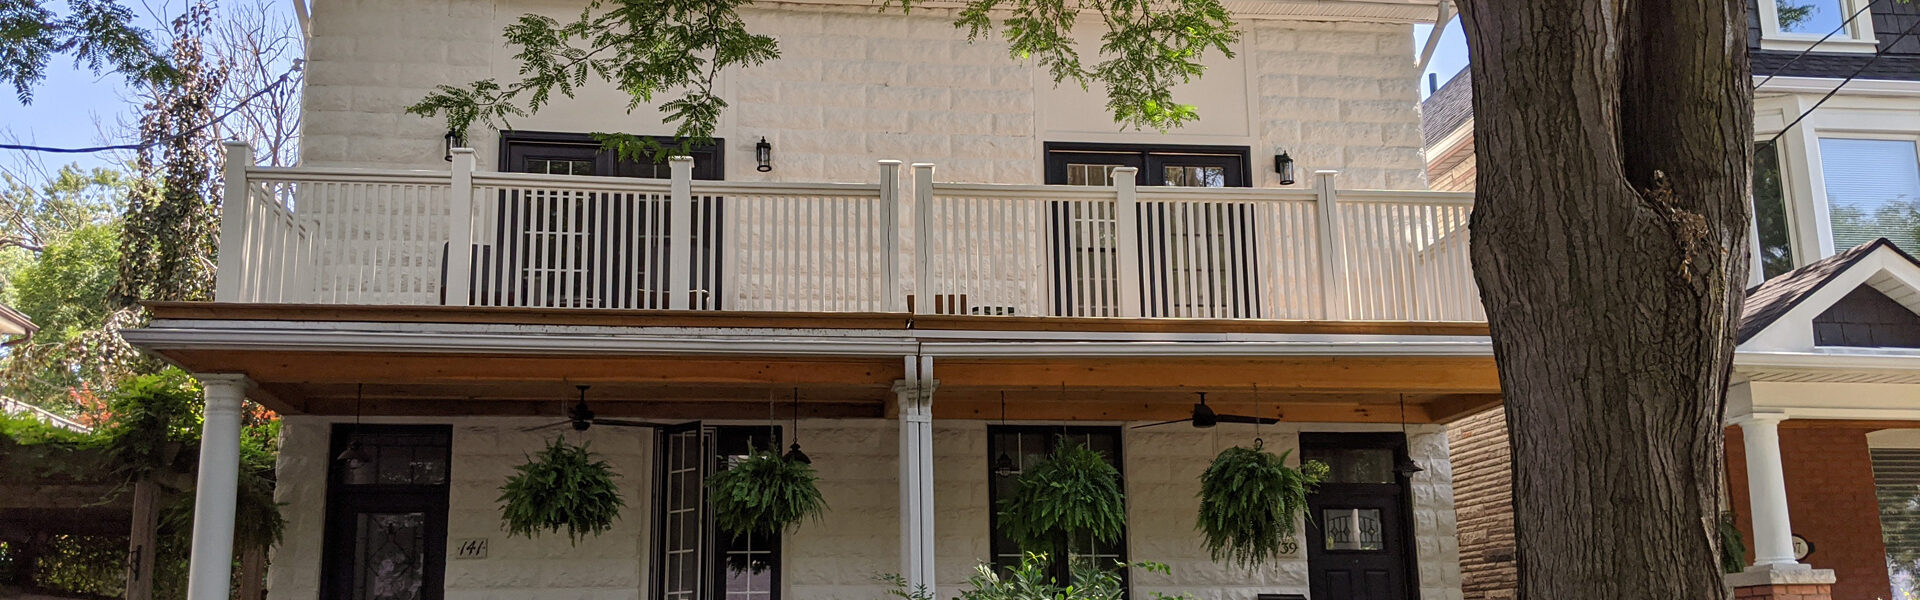
Enhanced Appearance
Another advantage of exterior house painting is that it can elevate the appearance of your home. A quality paint job can make your home look more attractive and inviting, which can increase its curb appeal and overall value. It can also give your home a fresh and updated look making it a neighbourhood standout. Plus, exterior paint offers you the chance to put your own flair on the property!
Choosing the Right Type of Exterior House Paint
With so many options available, it can be challenging to know which paint type is right for your home. However, selecting the right type of paint is crucial to ensuring that your house looks great and stays protected from the elements.
1. Acrylic Paint
Acrylic paint is a popular choice for exterior house painting. It’s water-based but contains chemicals that allow it to expand and contract with the surface it’s applied to. Acrylic paint dries quickly and is easy to clean up. It’s also resistant to fading and chalking, making it a perfect choice for homes located in areas with high UV exposure. Acrylic paint also doesn’t emit strong odours, so it’s ideal for those who are sensitive to smells. Plus, its water base makes it an environmentally friendly option. However, acrylic paint is not as durable as oil-based paints and may not provide long-lasting coverage. In summary:
- Advantages of Acrylic Paints:
- More adhesive than latex
- Durable material
- Environmentally friendly
- Disadvantages of Acrylic Paints:
- Difficult to blend
- Problems painting over oil-based finishes
- Requires more regular maintenance
2. Latex Paint
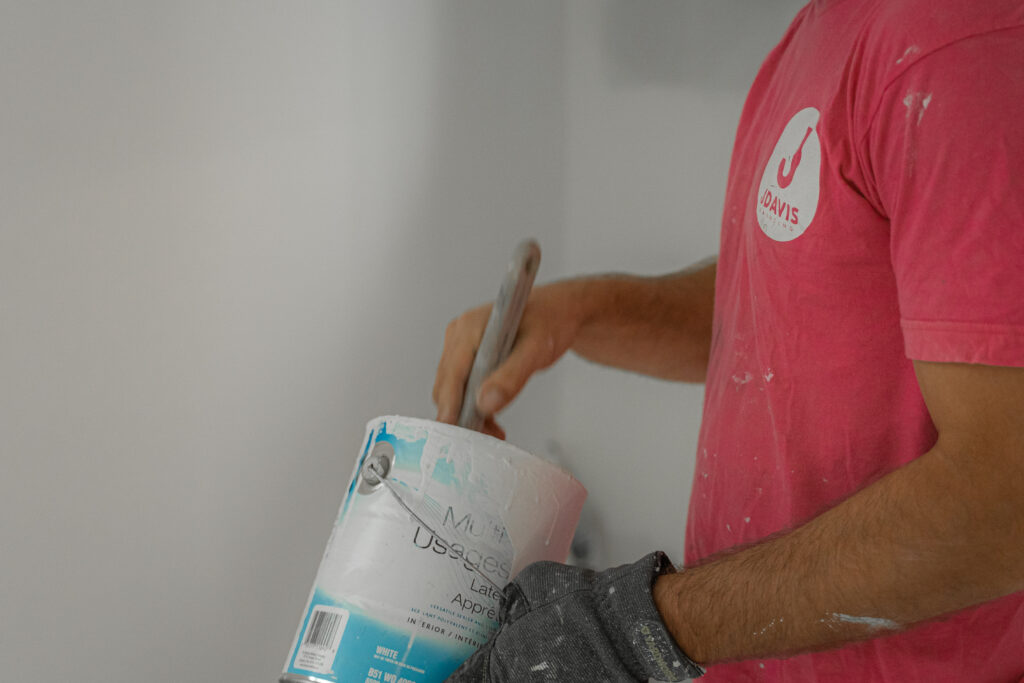
Latex paint is another water-based exterior house painting option that is easy to apply and clean up. It’s also an affordable option, making it a popular choice for many homeowners. Since latex paint dries quickly, it’s simple to apply two coats in one day. Latex paint is ideal for homes in areas with high humidity as it is resistant to mildew growth. It’s also fade-resistant and provides excellent coverage. But, like acrylic paint, latex paint is not as durable as oil-based paints and may not hold up as well in harsh weather conditions. In general:
- Advantages of Latex Paints:
- Colours won’t yellow
- Easy clean-up with soap and water
- Non-flammable
- Disadvantages of Latex Paints:
- Less durable than oil-based paints
- Fast dry time means it may show brush strokes
3. Oil-Based Paints
Oil-based paints are known for their durability and longevity. They provide excellent coverage as they blend seamlessly. This means they’re perfect for painting large surfaces that must be painted over time. Oil-based paints are also resistant to peeling and cracking, so they work well on homes with wood siding. On the other hand, oil-based paints are more challenging to clean up and have a strong odour. They also take longer to dry, which means that you’ll need to wait longer between coats.
It’s important to know that as environmental restrictions get tougher and tougher, oil paint is becoming harder and harder to come by. Many paint stores don’t carry oil paint at all. Overall:
- Advantages of Oil-Based Paints:
- Long durability in high-traffic areas & harsh weather conditions
- Smooth coverage
- Ideal for large surface areas
- Disadvantages of Oil-Based Paints:
- Difficult to clean up: requires chemicals to clean brushes and spills
- Odorous and potentially toxic fumes
- Longer dry time
- Very difficult to get ahold of
Different Paint Finish Options
Choosing the right paint finish is just as important as selecting the right type of paint. Different paint finishes offer different aesthetic and functional benefits, and it’s crucial to understand the differences between them to ensure you choose the right one for your project. It’s probably worth noting that some paint companies have started naming their sheens with non-standard descriptions… velvet, suede, pearl, low lustre, and who knows what will come next! Here are the most common ones:
Flat Paint Finish
Firstly, flat paint finishes have a matte appearance that is not recommended for most home exteriors. They work to cover surface imperfections as they don’t reflect light and create a smooth, even appearance. However, flat paint finishes aren’t the most durable and their surface can become chalky and difficult to clean off. This means that this finish requires more regular maintenance and effort than other exterior finishes.
Eggshell Paint Finish
An eggshell paint finish is one of the most popular exterior finish options. They have a low-sheen appearance that falls somewhere between flat and satin. Since eggshell finishes aren’t too dull or shiny they make a great choice for a range of siding types. The only downside is that eggshell finishes are hard to touch up in small spaces without the sheen spots being super noticeable.
Satin Paint Finish
Satin finishes have a smooth, velvety appearance that’s somewhat glossy. They are more durable than flat and eggshell finishes, making them resistant to scratches, dents, and stains. While satin paint finishes are also generally more expensive than eggshell, they’re also easy to clean and maintain, making them a worthwhile investment to some homeowners.
Semi-Gloss Paint Finish
A semi-gloss finish is best used for trim and doors– surfaces that get a lot of wear and tear and may be scrubbed regularly. They’re highly durable and resistant to moisture and stains, making them easy to clean and maintain. Unfortunately, semi-gloss finishes will however reveal some of the imperfections of whatever surface it’s painted onto.
Gloss Paint Finish
Gloss finishes have a highly reflective appearance and are the most durable of all paint finishes. Similar to semi-gloss, they’re ideal for high-traffic areas such as doors and outdoor trim. But, the reflective sheen of gloss finishes will also highlight little imperfections. This means a gloss finish may not be the best choice for large surface areas.
How to Choose Your Colour Scheme
This is the part that most people find the most difficult! Makes sense– if you don’t like the colour of your home you’ll have massive regrets later on! We definitely don’t want that.
With the right colours, you can enhance the beauty of the architecture and surroundings while reflecting your personality. Remember, a well-chosen colour scheme can transform a house into a home, creating a space that is inviting, comfortable, and beautiful.
So, here’s a handy checklist of things to think about when choosing your exterior paint colours:

Understand the Architectural Style
The first step in choosing a colour scheme that complements your home is to understand its architectural style. This can range from traditional to modern, each with unique features that certain colours will highlight. For instance, if you have a traditional style home there may be features such as ornate trim and moulding, while a modern home may have sleek lines and a minimalistic design. And believe it or not, colour affects this aesthetic!
Consider the Surrounding Environment
The environment around your home is another big thing to think about while picking your colours! Depending on your vision, a home’s colour scheme can blend in or stand out amongst its surrounding landscape. One example I commonly see is homes located in forested areas that match earthy tones such as browns, greens, and grays. But I’ve also had other lucky clients with waterfront properties that fit well with cool blues and sandy beiges.
Evaluate the Existing Features
It’s also necessary to evaluate the existing features of the home such as the roof, windows, and doors. These elements may already have a specific colour scheme or finish that you want to match with your exterior paint colours. Your red brick home may look best with a colour scheme that includes warm earthy colours like brown or beige, while a home with a blue roof may look best with a paint that includes shades of blue or gray.
Test the Colours
Once you’ve selected a colour scheme, it’s time for the fun part (testing out your colour options!). Paint samples on the exterior of your home and evaluate how they look in different lighting conditions throughout the day. I find that it’s also a good idea to test the colours against the existing features of the home to ensure that they complement each other. This will help you make a confident decision and avoid costly changes later on.
Preparing the Exterior Surface
Before you can start painting away on the exterior of your house you must properly prepare the surface. Take your time with these steps to ensure a beautiful and long-lasting paint job.
Step 1: Clean the Surface
First things first– it’s clean-up time! Any dirt, grime, or debris left behind on the surface can prevent paint from adhering properly (ew!). But we can take care of that. Start by using a garden hose to rinse the surface. Then, use a pressure washer or a stiff-bristled brush to scrub the surface with a cleaning solution.
There are many commercial cleaning solutions available, but if you’re feeling like a DIY scientist, you can also make your own by mixing water, bleach, and detergent. Rinse the surface again with a hose and then allow it to dry completely before moving on to the next step. Patience is key!
Step 2: Scrape Away Loose Paint
Once the surface is clean and dry, it’s out with the old and in with the new! Use a paint scraper or a putty knife to remove any peeling or flaking loose paint. Safety always comes first, so be sure to wear eye protection and a dust mask to protect yourself from potentially harmful debris. If your paint is being stubborn, you may also need to use a heat gun to soften the paint before scraping it away.
Step 3: Sand the Surface
Now that the loose paint is gone, it’s time to smooth out the surface. Sanding helps to smooth out any rough spots and create a surface that the paint can adhere to. Start with coarse-grit sandpaper and work your way up to a fine-grit sandpaper. I know it’s a long and tricky process but don’t forget to sand the edges of the remaining paint to create a smooth transition between the old and new paint. If you have several layers of paint you may not be able to remove the ridges, but you will want to at least reduce how pronounced they are.
Step 4: Repair Any Damage
If you found any cracks or holes in the surface during your inspection, now is the time to pull out your skills. Use a high-quality exterior filler to fill in any gaps or cracks. Be sure to allow the filler to dry completely before sanding it smooth.
Step 5: Spot Prime Any Bare Wood
Finally, you’re on the home stretch! Priming your home’s exterior helps to seal the surface and create a smooth base for the paint. Use a high-quality exterior primer and allow it to dry before moving on to painting.
Repairing Damaged Surfaces
A huge bummer is that the wear and tear from weather and time may bring some damage to your home’s exterior. That’s why I always tell clients how important it is to identify and repair any damaged surfaces before applying exterior house paint to prevent further damage.
Identifying Damage:
Now I know you’re probably thinking “I’m not an architect, how am I supposed to tell what needs repair?” Trust me you’ll know when you see it.
First things first– look for cracks, holes, gaps, or any other signs of damage on the surface of your home. Pay particular attention to the details on siding, trim, and windowsills. Signs of water damage are also typically indicated by discolouration, peeling paint, or mould and mildew growth (really you can’t miss it).
Repairing:
Once you have identified the damaged surfaces, it’s time to get fixing. For cracks, holes, and gaps, use a high-quality exterior filler. Clean the damaged area with a stiff-bristled brush to remove any loose debris, and then apply the filler according to the manufacturer’s instructions.
If the damage is more extensive, it may need to be replaced. I commonly see that damaged siding or trim usually needs the most repair! Use a pry bar to remove the damaged piece and replace it with a new one. Be sure to use the same type of material and colour to ensure a seamless repair. If you’re not comfortable with this type of repair, don’t worry there’s no shame! A pro construction team should be happy to help you.
Don’t Forget Primer!
If you’ve made it this far, then you’re killing the game. Great job!
Priming is the last preparatory step before painting the exterior of your house. I can’t tell you enough how important primer is in giving you a stunning finished paint product.
Improving Adhesion
What’s even the point of primer? The primary role of a primer is to improve the adhesion of the paint to the surface being painted. A primer creates a barrier between the surface and the paint, allowing the paint to bond more securely to the surface.
Without a primer, the paint can peel, crack, or flake off the surface over time. So, a good primer should fill any small cracks or imperfections in the surface, creating a smooth and even surface for the paint to adhere to.
Ensuring Uniform Colour and Sheen
Priming also plays an important role in maintaining a uniform colour and sheen across a finished exterior paint job. By sealing the surface being painted, primer prevents any stains or discolouration from bleeding through the paint.
From my experience, primer also helps to provide an even base, ensuring that the colour and sheen are consistent throughout the entire surface. This is especially important when painting over different surface materials or when using different types of paint on the same surface.
Choosing the Right Tools
A good DIYer always has the right tools on hand. And proper equipment is a must when it comes to achieving a professional-looking and long-lasting paint finish. If you don’t have what it takes, a trusted house painter like my team at JDavis Painting will always have these tools on hand to provide a stunning paint job.
If you’re taking on this job yourself, here’s the list of equipment you’ll need:
1. Paint Brushes
A good quality paintbrush is a must-have tool for exterior painting. Choose a brush that is specifically designed for exterior use and has bristles that can hold a large amount of paint at a time for maximum productivity. You’ll also need a range of brush sizes for different areas of the house, such as trim, corners, and edges. Start with a 2.5” Sash Polynylon brush. The “sash” part means it’s angled, so it’ll be easier to create straight lines, and polynylon is good for acrylic, latex and oil paints.
2. Rollers
Rolling out your home’s new look means you’re going to need a lot of paint rollers. Choose a roller with a medium to long nap (how fluffy it is) to apply the paint evenly and achieve a smooth finish. Depending on the different areas of the house exterior you’ll also need a variety of roller frames and cover sizes.
3. Sprayers
A paint sprayer is also an excellent tool for applying paint to large exterior surfaces quickly and efficiently. However, it can be challenging to control the overspray, and so you might need some practice to achieve a professional-looking finish. I would usually put this tool in the ‘leave it to the pros’ category.

4. Ladders
The last thing you want is a whacky makeshift height solution when painting your house (can someone say safety hazard). That’s why a sturdy ladder is essential to reach high areas of the house. Make sure it’s well secured and has a sufficient weight capacity that can support you and your tools.
Different Painting Techniques
The way you choose to paint your home really depends on its size and your vision for the final look! No matter what route you take, each exterior house painting technique has its advantages and disadvantages.
Brushing
Brushing is the most traditional and time-tested technique for exterior painting. It involves using a brush to apply paint to the surface, working in a back-and-forth motion. This is ideal for painting smaller areas, such as trim, corners, and edges, where precision (& patience) is required. Brushing allows for control over the amount and placement of paint and can produce a smooth and even finish. However, brushing can be time-consuming, especially for larger surfaces, and can leave brush marks if done incorrectly.
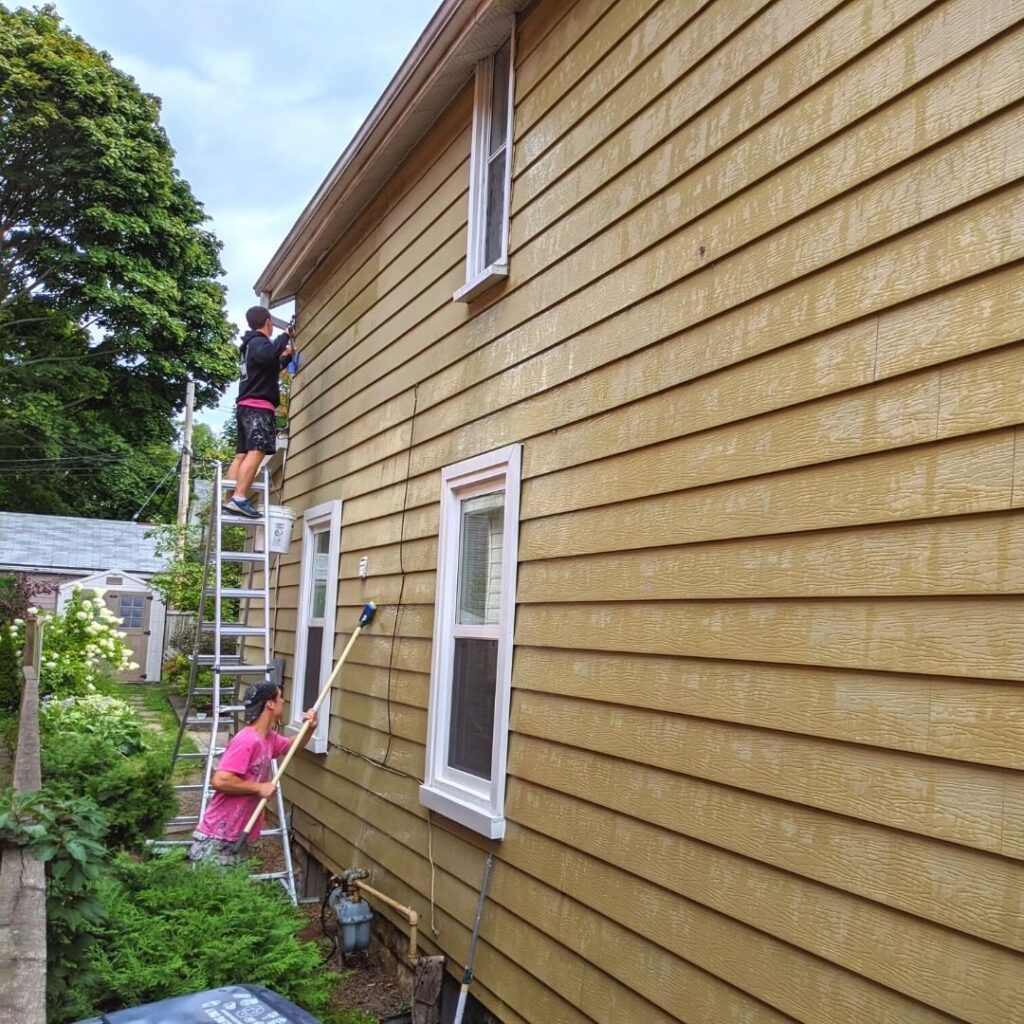
Rolling
Rolling is another common technique for exterior house painting, particularly for larger surfaces like walls and siding. This involves using a roller to apply paint in sections, allowing for faster coverage of house siding and a smooth and even finish. Just keep in mind that rolling can be difficult to control around corners and edges.
Spraying
Spraying is probably one of my favourite paint techniques as it applies a fine mist of paint onto the surface (super satisfying, right?). When done correctly, spraying allows for quick coverage and can produce a smooth and even finish. However, spraying can be messy, and sloppy overspray can be a concern if not done correctly. For a quality finish, spraying requires skill and experience, so it’s best to hire a trusted house painter (we got you).
Safety Considerations
If there’s one thing I want you to take away from this it’s that safety must always come first!
Working at heights with professional painting equipment is extremely risky. Proper safety considerations help prevent injuries that can come from falling such as broken bones, head trauma, and even death. It can be more dangerous than you’d think! Chemical harm including respiratory problems or skin irritation can also be prevented with personal protective gear.
Additionally, safety precautions can also prevent damage to your property. That’s why I always have my crew use proper ladder safety techniques to prevent the ladder from slipping or damaging the wall or other surfaces, saving you money and time on repairs.
Other essential safety considerations include:
- Wearing protective gear such as a respirator, gloves, and goggles.
- Using proper ladder safety techniques– including using a sturdy and properly placed ladder, and maintaining three points of contact while climbing.
- Using scaffolding or other equipment to work at heights safely.
- Protecting the surrounding area from paint splatters and spills using drop cloths or tarps.
- Following the manufacturer’s instructions for using paint and other chemicals safely.
Cleanup and Maintenance
Unfortunately, mom’s not here to clean up after you so don’t forget to clean up properly and frequently to make your paint job last! Ongoing maintenance tasks will help to keep your exterior paint looking great for years to come.
Paint Clean Up
Once your home’s exterior has been painted it’s time to turn on some cleaning music and wrap up (I’m partial to Jackson 5 for this part of the project). Remove any paint cans, brushes, and other equipment, and dispose of any waste materials properly. If you have any leftover paint, label and store it according to the manufacturer’s instructions. If you don’t plan on keeping the paint cans you can drop them off at the Hazardous Waste disposal at any Toronto City Dump. It’s free J
Don’t forget to also take a close look at your finished work to ensure that there are no drips, smears, or other imperfections. You can touch up any areas that need it with a small brush or roller.
Exterior House Painting Maintenance
I know you want your exterior house painting job to last as long as possible! That’s why a little care for your home’s exterior can go a long way in upkeeping a stunning paint job for years to come.
So here are some house painting maintenance hot tips:
- Regular Cleaning – Keeping your home’s exterior clean will automatically benefit the paint’s appearance. Sweep away any debris, dirt, or cobwebs that may accumulate on the painted surfaces. Additionally, use a hose or pressure washer to remove dirt and grime buildup from the surface.
- Touch-Up Painting – Over time, your exterior paint may begin to fade or chip. Periodic touch-up painting can help to maintain the appearance of your paint job. Be sure to use the same type and colour of the paint as the original job for best results.
- Repair Damage – If your exterior paint has sustained damage from weather or other factors, it’s important to repair it promptly to prevent further damage. Hire a professional to repair any cracks, holes, or other damage to the surface before repainting.
- Maintain Your Equipment – Proper maintenance of your painting equipment, such as brushes, rollers, and sprayers, can help to ensure that they function properly and last longer. Clean your equipment thoroughly after each use, and store it properly so it’s ready for your next paint project.
Hiring a Professional for Your Exterior House Painting Needs

While I have no doubt you could finish an exterior house painting job on your own, just know that there are many risks involved. Instead, maybe consider hiring a trusted house painter like us to handle your project. My team of qualified professionals at JDavis Painting has years of experience in providing top-quality exterior house painting services for homes of all shapes and sizes. From selecting colours to finishes for your home’s unique style and environment, we offer a range of services to bring your vision to the finish line.
We use only the highest-quality paints and materials, ensuring a long-lasting, durable finish that stands up to the elements. I’ve made sure that our team is equipped with only the most trusted exterior house painting tools and techniques, enabling us to work efficiently, without sacrificing quality. And with our commitment to safety, you can trust that the job will be done securely so you don’t have to worry!
From house paint colours and paint types to painting techniques and safety considerations, I hope this exterior house painting guide was useful! If you’re looking for professionals to handle your exterior paint project, consider JDavis Painting, your expert Toronto painters.
Contact us today to see how our team of qualified professionals can serve your home’s exterior house painting needs. Can’t wait to work with you!


